
1969 GTO Vintage Car Radio Bluetooth & FM Upgrade
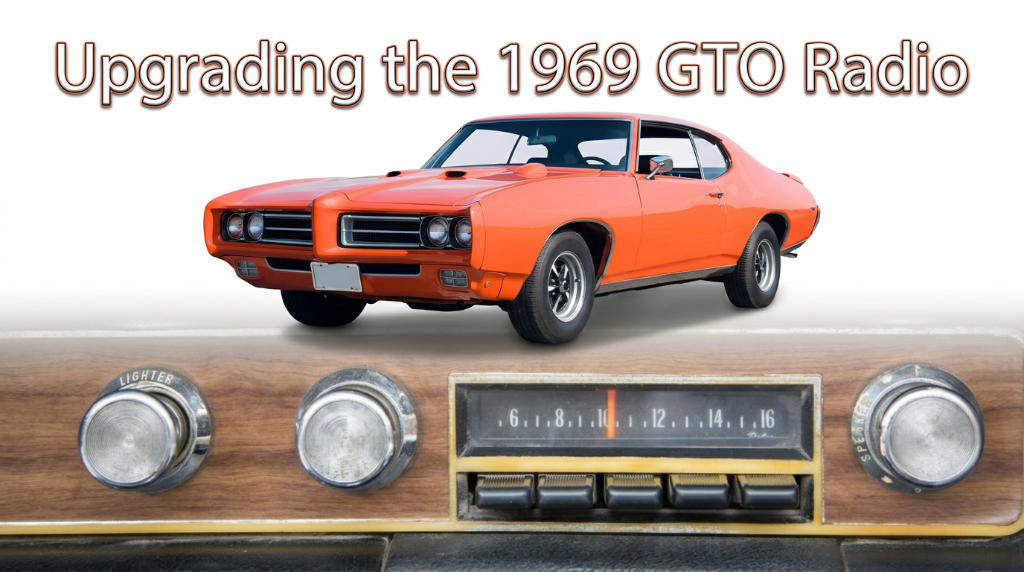
The Judge Gets an Upgrade: 1969 GTO 92ATB1 AM Radio to FM, Bluetooth & Aux
When a 1969 Pontiac GTO shows up on your workbench — even if it's just the radio — you sit up a little straighter. This was The Judge's era. Ram Air engines, hood scoops, and a factory AM radio that, fifty-seven years later, had developed some opinions of its own about whether it wanted to work.
The 92ATB1 is the original AM radio fitted to many 1969 Pontiac GTOs. It's a compact, transistorized unit — solid-state by design, with a distinctive horizontal frequency scale and the kind of chrome-detailed faceplate that looks period-correct in the GTO's instrument panel. The owner sent it to us with a simple brief: repair it, or upgrade it. We'd assess it and give them an honest recommendation.
What followed was a satisfying, systematic diagnosis, a few colourful discoveries, and ultimately a decision that made a lot of sense for this particular radio and its owner. Let me walk you through it.
First Things First — The Power Switch
The first fault was immediately apparent before any test equipment came out: the power switch was faulty. On radios of this era the volume potentiometer and power switch are typically a single integrated component. When the switch section fails, the radio is simply dead. No power, no test, no diagnosis.
The standard move here is to temporarily jump the switch contacts so power reaches the circuit — this lets you assess whether the rest of the radio has any life in it before committing to a switch replacement. I bridged the contacts, connected the radio to the bench supply through the dim bulb current limiter, and powered it up.
A dim bulb tester is simply an incandescent light bulb wired in series with the circuit under test. A healthy radio will normally flash the bulb bright for a split second as inrush current charges the filter capacitors, then the bulb dims to a faint glow as normal operating current takes over. If there's a dead short or heavy fault current, the bulb stays bright and sustained — it's absorbing excess current and protecting the radio. It's one of the most useful and underrated tools in vintage electronics repair.
The bulb lit up like I'd asked it to replace the sun. Bright, immediate, and sustained. That's not the lazy glow of a radio drawing normal operating current — that's a radio telling you something is significantly wrong downstream. The spark plate and choke were tested and both checked out fine, which directed attention toward the audio output stage.
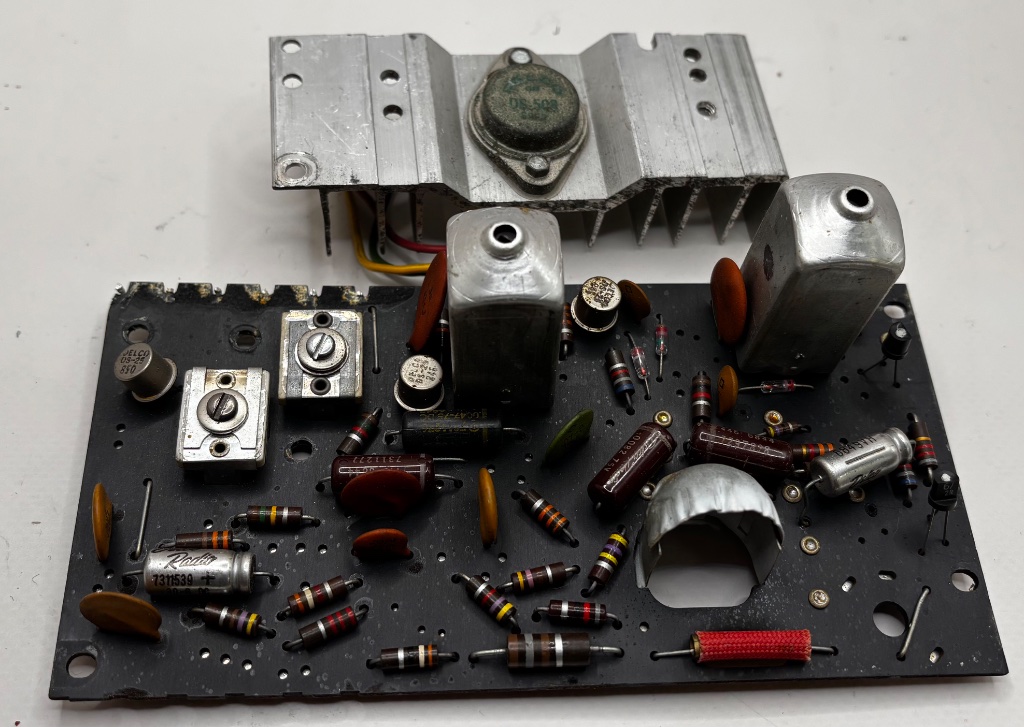
The Germanium Output Transistor — A Classic Culprit
Transistorized car radios of the late 1960s used germanium output transistors in the audio power amplifier stage. This one uses a DS501 unit. Germanium transistors were the technology of the era, and they have specific failure modes that show up regularly in radios of this age.
The telltale sign of a failed germanium output transistor is continuity between the base and emitter junctions. A healthy transistor should show a diode-like junction. When you measure continuity straight through, the transistor has shorted internally, and it will pull heavy current from the supply rail. That's exactly what the dim bulb was showing us.
Germanium transistors are more temperature-sensitive than their silicon successors, and they're prone to thermal runaway. Decades of Canadian summers parked on a hot dashboard don't help. The NTE105 is a reliable modern replacement for many of the original germanium output devices used in radios of this period.
I grabbed an NTE105 from the parts shelf, clipped it in with alligator leads as a bench substitute — not pretty, but effective — and powered the radio up again. The dim bulb dropped to a healthy glow, and there it was: that beautiful, unmistakable thump from the speaker as the output stage came to life. If you've spent any time working on vintage radios, that thump is one of the most satisfying sounds in the hobby. It means something is alive in there.
But no audio. The thump confirmed the output stage was functional with the replacement transistor, but the signal wasn't getting through. Time to trace it.
Signal Tracing — And Where Things Stopped
Signal tracing on a transistor car radio involves injecting a known signal at various points in the circuit to identify exactly where the signal chain breaks down. Since we were confident of the output stage status, we started at the front end this time and worked our way through the circuit. Signal stopped after the first IF transformer. Everything after that point was silent.
I inspected the solder joints throughout the board carefully. Cold and fractured joints are extremely common on radios of this age — thermal cycling, vibration, and simple time cause the solder to crystallize and crack, creating intermittent or open connections. On this chassis, however, the joints all looked reasonable. No obvious cold welds. The transformer windings of the IF transformer were tested and the primary was found to be open — completely busticated!
And then I spotted something else — sitting right there in plain sight, doing absolutely nothing to hide its guilt: the multi-section electrolytic capacitor can. Swollen. Leaking. The can had distorted visibly at the top, and there was evidence of electrolyte seepage around the base.
Multi-section electrolytic cans in vintage car radios are almost always due for replacement regardless of whether the radio has symptoms. The electrolyte inside these capacitors dries out, breaks down chemically, and eventually leaks. A leaking can will contaminate the circuit board around it and cause exactly the kind of excessive current draw we were seeing.
At this point I paused the troubleshooting and compiled the findings. The fault list: a faulty power switch, a shorted germanium output transistor, an open IF transformer primary, and a swollen leaking multi-section electrolytic can. Each one is a straightforward repair in isolation. Together, they represent a meaningful labour investment — and given that we still hadn't continued the IF stage assessment, there was a reasonable probability of additional faults waiting beneath the surface.
I called the customer.
The Conversation — Repair vs. Upgrade
I laid it out plainly. Here's what we know is wrong. Here's what a full repair to original specification would cost. Here's what a Retro-RAD conversion would cost — and here's what you'd get for each option.
For the repair path: a working AM-only radio, exactly as it left the factory in 1969. Correct. Authentic. Period-perfect. And entirely reliant on AM broadcasting, which — depending on where you live — ranges from "adequate" to "three stations and a lot of static."
For the Retro-RAD path: FM tuning, Bluetooth audio streaming from any device, and an auxiliary input jack — all through the original faceplate, the original knobs, and the original dial. The radio looks identical from the outside. You'd never know.
The customer didn't need long to think about it. They went with the $350 USD Retro-RAD upgrade.
The Retro-RAD Installation — Seamless by Design
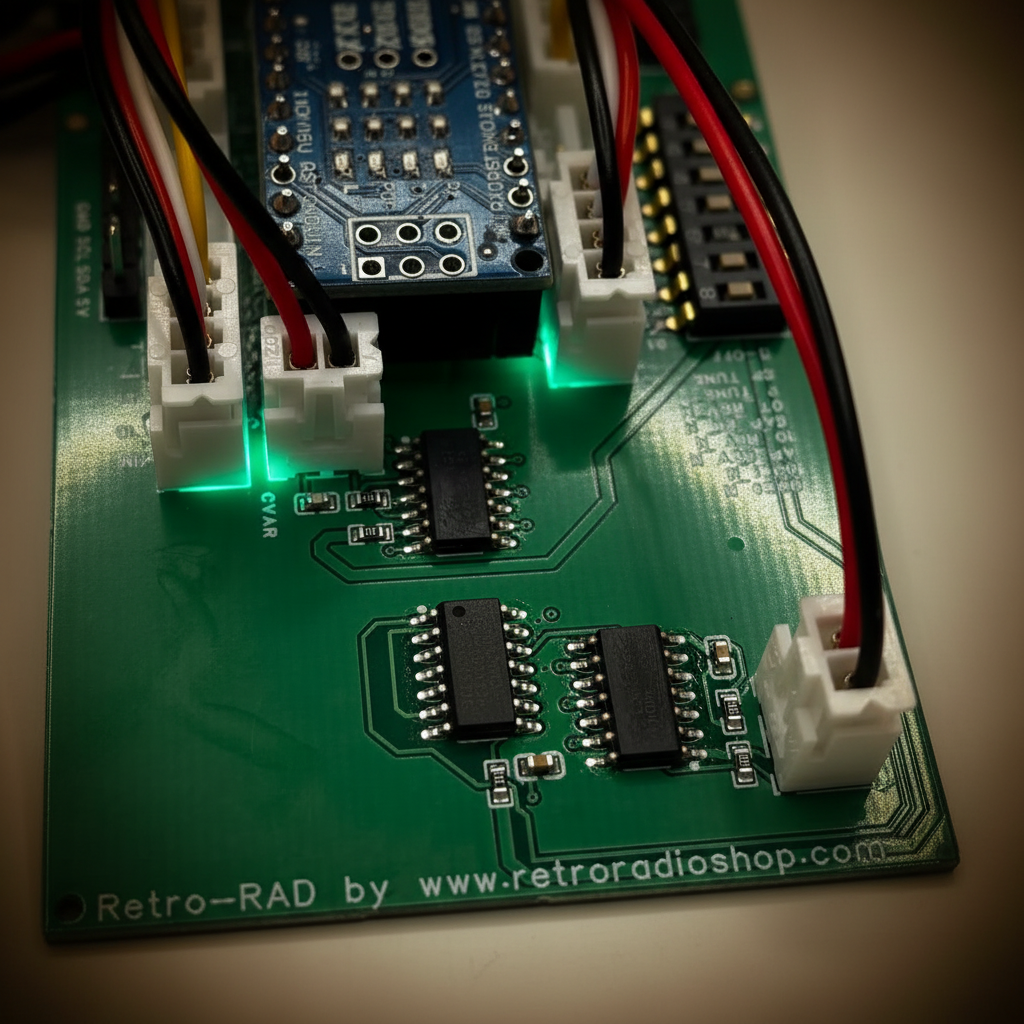
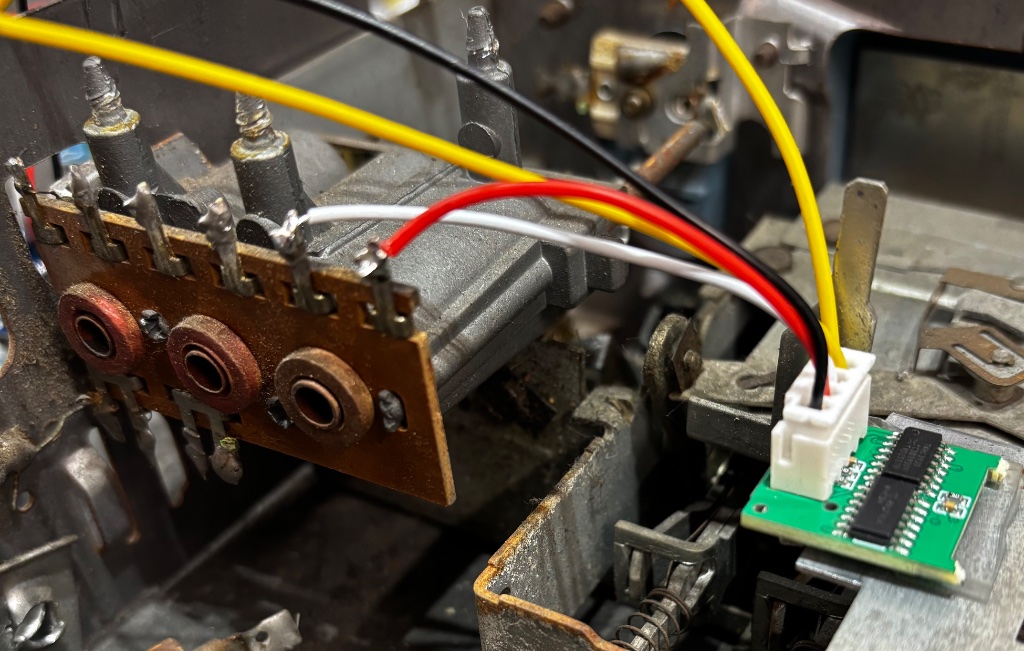
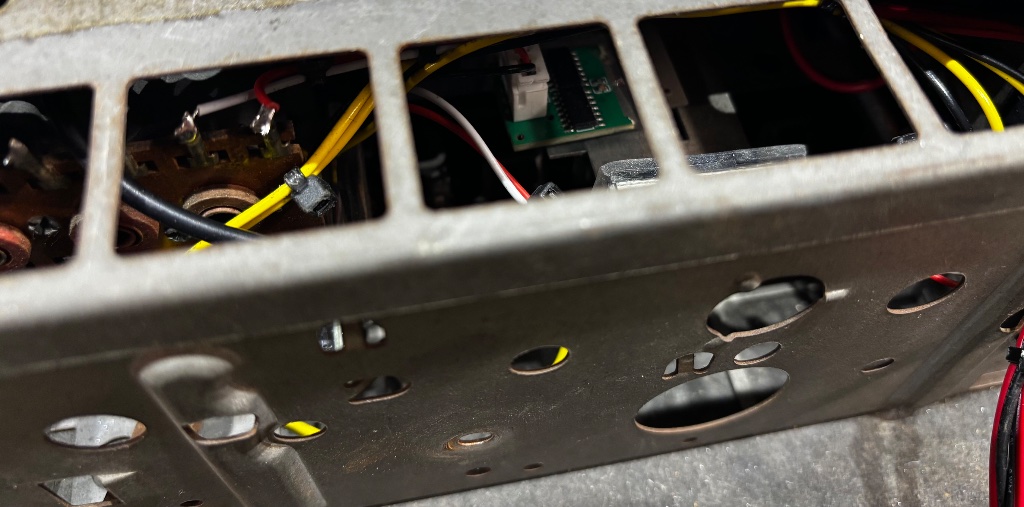
The Retro-RAD system replaces the original electronics while retaining everything the owner actually interacts with. The volume control uses the original potentiometer — which we replaced with a correct-spec unit as part of the job, solving the switch fault at the same time. The original tuning mechanism, dial pointer, and frequency scale all remain fully functional.
That last point is worth dwelling on, because it's genuinely clever. The 92ATB1 uses a permeability tuning system — mechanically-driven slugs that move in and out of coil forms to vary the inductance and therefore the tuned frequency. It's elegant engineering, and it gives the radio its characteristic smooth, precise tuning feel.
The Retro-RAD includes a proprietary LC measuring circuit that attaches directly to the original tuning condenser assembly. It reads the inductance of the original tuning slugs in real time as you turn the tuning knob. The board uses this measurement to determine exactly where the dial pointer is positioned, and selects the corresponding FM frequency for that position. Turn the knob, watch the pointer sweep across the original dial scale, and the Retro-RAD follows it — locking onto the correct FM station at each position. It's the original tuning experience, reimagined for FM. The first time you see it working, it feels like a small miracle. The second time, you just take it for granted — as all good engineering should be.
The auxiliary input jack was routed to an accessible location on the rear of the chassis, invisible from the front. Plug in a cable and the radio switches seamlessly from FM or Bluetooth to the wired source. Three inputs, one radio, zero visible modification.
Why the Original Radio — Not a Knockoff
I want to address something that comes up regularly when people are considering this kind of upgrade. There are products on the market — digital replica radios, reproduction units with modern internals and period-styled faces — that are positioned as an alternative to upgrading the original. The price point is often tempting.
They are not the same thing. Not even close.
The original 92ATB1 in a 1969 GTO is not just a functional component — it's part of the car's identity. The specific faceplate design, the font on the frequency scale, the profile of the knobs, the way the escutcheon integrates with the instrument panel — these are period-correct details that a reproduction will approximate but never replicate. Anyone who knows 1969 GTOs will know. They always know.
For many classic car owners, originality has real financial and legal implications. In British Columbia, ICBC collector vehicle status requires that the vehicle be maintained in original or authentically restored condition. Insurance programs through Hagerty, Grundy, and similar specialists often specify that modifications must be disclosed and may affect agreed value coverage. Concours judging at events sanctioned by organizations like the Pontiac-Oakland Club International (POCI) deducts points for non-original components. A reproduction radio where an original should be is a deduction. An original radio with an invisible internal upgrade is not.
The Retro-RAD upgrade preserves every externally visible original detail. The car remains original to all outward appearances. The owner gets modern audio. Nobody loses. That's the whole point.
I'll also note — gently, and with the awareness that I've made this mistake myself — that I once tried to source a "close enough" reproduction knob for a 1965 radio and spent forty-five minutes explaining to my customer why the profile was "essentially identical" before he politely pointed out that it was visibly wrong from three feet away. Never again. Original or upgrade the original. There is no third option.
Final Result
The completed 92ATB1 left the bench looking exactly as it arrived — chrome knobs, original dial glass, correct faceplate. Internally it's an entirely different radio: FM tuner, Bluetooth streaming, auxiliary input, and a new volume/power potentiometer that operates with the smooth, positive action it had when new.
The LC measuring circuit sits quietly against the original tuning slug assembly, reading position, selecting frequency, doing its job invisibly. Turn the knob and the pointer sweeps the original scale. The GTO's radio looks like 1969. It sounds like today.
Wherever this car ends up — on the road, at a show, or parked in someone's garage while they listen to a playlist through their phone — the radio is doing exactly what it was always meant to do. Playing music. Just with a slightly broader repertoire than AM radio in 1969 could provide.
We work with car radios from virtually every make and era. If your radio is faulty, failing, or simply not giving you what you need from the dash of your classic car, get in touch. We'll assess it, give you an honest recommendation, and if an upgrade is right for it, do the job properly. Contact us at info@retroradioshop.com.
1-855-2GORETRO
(1-855-246-7387)
Looking to evaluate our AMFm restoration ‘67 Ford .